


The Coronary heart of Tuzari is among the more difficult dungeons in Fellowship, because of the nature of navigating the map. Whereas there’s undoubtedly multiple option to route your manner by means of it, your route undoubtedly issues. By lighting braziers, you’ll chart a one-way course by means of this temple setting, and because you additionally must hit a sure Kill Rating with a timer, it’s essential to not do a lot, if any backtracking.
With three bosses and plenty of trash pulls, The Coronary heart of Tuzari could be a difficult dungeon in Fellowship. Nonetheless, should you strategy it with teamwork, it shouldn’t be too exhausting to interrupt by means of to defeat Prophet Ez’rath on the finish.
What to find out about The Coronary heart of Tuzari dungeon mechanics and trash enemies in Fellowship
The Coronary heart of Tuzari notes
- Kill Rating Requirement: 201
- Timer: 28M
- Major dungeon mechanic: Gentle braziers to get to cross past demon partitions
- Bosses: Moar’Gore, Grasp of Sacrifice, Vun’Kahr, the Thorned, Prophet Ez’rath
Whereas most of The Coronary heart of Tuzari isn’t too overwhelming, the ultimate boss struggle versus Prophet Ez’rath could be brutal should you don’t know what he brings to the desk. One other factor that may cease persons are the Executioner mobs.
They’ve a stacking debuff, which might actually add up in case you are combating too lots of them without delay. You even have to verify, because the tank, to not face them in direction of your allies, in order that they don’t get hit by it too.
The first conceit of The Coronary heart of Tuzari in Fellowship is to gentle the braziers alongside the trail, to carry down the demonic partitions. Nonetheless, this provides you a one-way route by means of the maps, so it’s essential to have a transparent concept of the place you’re going. That manner, you’ll be able to keep away from backtracking and losing time.
Moar’Gore, Grasp of Sacrifice’s trash pulls and mechanics in Fellowship’s The Coronary heart of Tuzari
Moar’gore, Grasp of Sacrifice trash enemies
- Sickle: Throw Dagger is unavoidable and randomly targets allies, so don’t pull too many of those without delay.
- Hellcaller: CC their Restore Vitality spell in order that they don’t heal. Demonic Lash additionally wants interrupting. Keep away from the circles on the bottom for Armageddon.
- Mancatcher: Keep inside 15 yards or so, as a result of in any other case they Grip, and pull you in.
- Bloodfang Raider: Healers must be able to do further therapeutic because of the Shred potential that may hit the tank.
- Pillager: They’ve a haste from Blood Frenzy, and achieve a well being buff when considered one of them dies. Attempt to cleave them down on the identical time to handle this.
- Ashen Arsonist: Flame Blast is a cone assault, so don’t goal them on the social gathering. Large Oogha Flame places a DOT on a random participant, so CC this if in any respect doable.
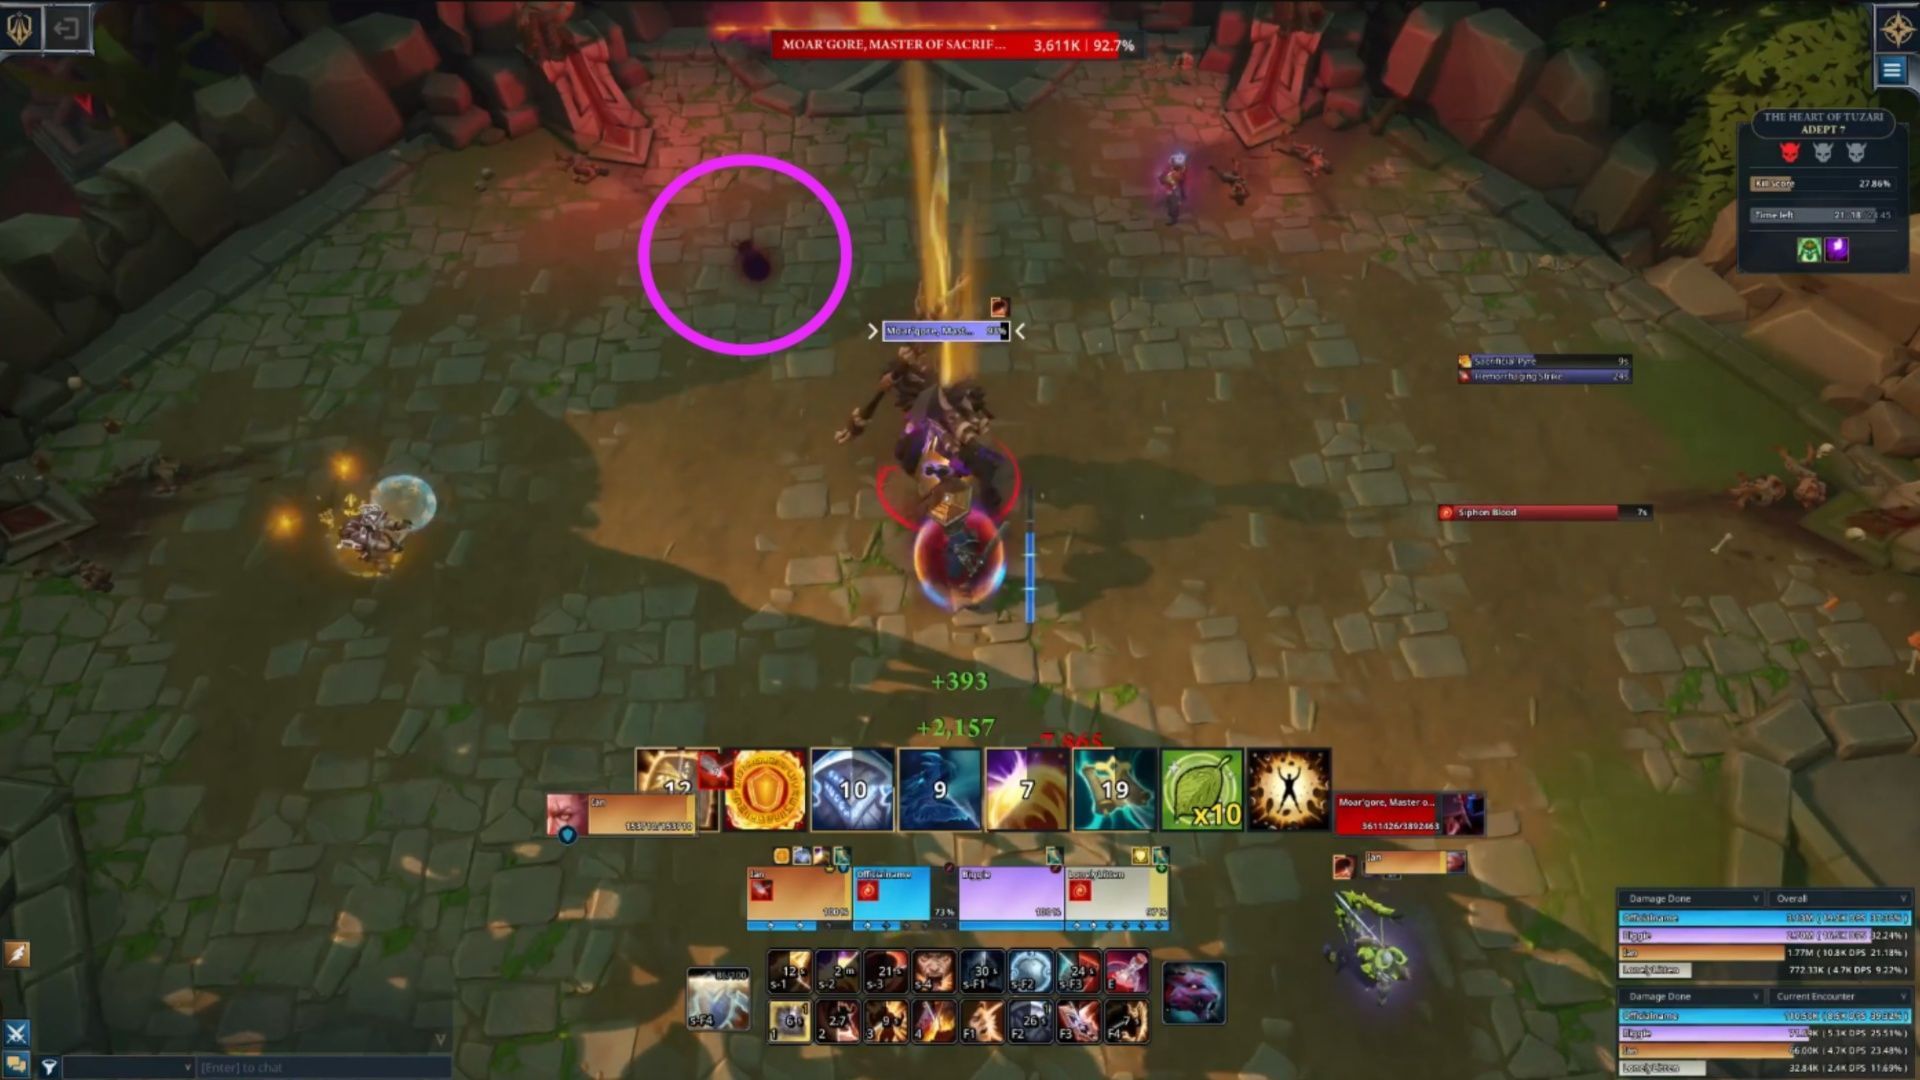
Whereas the trash pulls for the primary boss aren’t too unhealthy, Moar’gore, Grasp of Sacrifice himself could be an attention-grabbing boss for Fellowship gamers which can be acquainted with World of Warcraft. He’s bought three major skills, seen beneath, and to clear one of many debuffs, you’ll briefly want to face within the fireplace; you recognize, the factor we’re all the time taught to not do.
- Siphon Blood: Channels into three random pillars within the room, which fires an Orb that ricochets round. If one hits the boss, it offers group-wide harm. If one hits a participant, they obtain a debuff that will increase the harm they take by 20% per stack. Sacrificial Pyre flames removes this debuff.
- Siphon Blood enhances when the boss is at beneath 30% well being, making 5 orbs as a substitute of three.
- Hemorrhaging Strike: Highly effective strike that additionally offers a bleed DOT.
- Sacrificial Pyre: Lights an enormous space of the room on fireplace and applies a DOT to any gamers that enter the flames afterwards. Clears off Tainted Blood debuff.
No matter you do on this Fellowship boss struggle, be sure that the tank is not soaking these Siphon Blood orbs. That may make Hemorrhaging Strike hit tougher, and that could possibly be an excessive amount of to deal with.

The remainder of the social gathering soaks the orbs, and so long as not one of the orbs get by means of to the boss, the stacking debuff isn’t actually a problem. Strive to not get greater than 4 stacks although. When it’s time for Sacrificial Pyre, keep away from the preliminary explosion, but when you have to clear Tainted Blood, stand within the flames in a short time earlier than the explosion, to clear that off.
After this boss is defeated, you’ll be able to both go left or proper. It seems to be quicker and simpler to go proper, combating by means of Lashers, as a substitute of the humanoid enemies on the left.
Vun’kahr, the Thorned Maw trash pulls and mechanics for Fellowship’s The Coronary heart of Tuzari
Vun’kahr, the Thorned Maw trash enemies
- Profane Invoker: Can forged Shadow Bolt on the tank, so CC this. Wither DOTs a participant, could be CCed or dispelled.
- Slaughtervine: Gained’t do something till they’re stepped on. They do have a Thorns passive which displays 10% of injury taken, so be prepared with heals, simply in case.
- Barbarous Lasher: This can’t be CCed in any respect. Has a type of tank buster with Crush Armor, which reduces the tanks armor by 10%. Has a Thorns passive that displays 25% of injury taken.
- Nightmist Cutthroat: Can teleport for a Backstab, prepare because the tank to reposition.
- Executioner: Can’t be CCed, and hit tougher the decrease their well being will get. Has a Executioner’s Cleave cleave that makes you’re taking 5% extra harm (stacks). Don’t pull too many of those without delay.
- Provoke: Additionally does the Throw Dagger assault, so be careful for having too many of those up without delay.
- Hulking Bulgore: Can’t be CCed, and have a cost assault, Impale, if attacking them outdoors of Hulking Bulgore’s vary. Keep shut, however not too shut. Enrages at 50% well being, for extra harm/haste.
The Vun’kahr boss struggle in Fellowship actually requires a variety of motion,and truthfully, type of seems like a Closing Fantasy XIV boss struggle with all of the soaking you must do. It can periodically put marks on the bottom, and if a participant doesn’t stand in them, it would create a Dormant Slaughtervine. Whereas that doesn’t sound unhealthy, this boss has an influence to set off these Slaughtervines, even should you by no means step on them.

- Legion of Vun’Kahr: Seedlings spawn on the bottom that create Dormant Slaughtervines until stepped on.
- Increase Terrorvines: Creates Barbed Roots. 40% of injury they take is linked to the boss.
- Fangroot Snap: Tank buster, so be sure that to have a defensive cooldown prepared.
- Thornmother’s Slumber: The boss takes extra harm quickly, and prompts any Dormant Slaughtervines.
Arguably crucial a part of this struggle is to ensure you don’t go away any potential Dormant Slaughtervines, so all the time stand on the Legion of Vun’Kahr markings on the bottom. This may scale back the potential variety of Dormant Slaughtervines that present up once they forged Thornmother’s Slumber. The tankbuster, Fangroot Snap can be a cleave, so melee, be sure that to get out of the way in which.
Along with all of the above motion on this Fellowship boss struggle, when Increase Terrorvines is forged, the tank might want to instantly pull the boss to 1, to struggle them each on the identical time. Nonetheless, two of those spawn without delay. The opposite, you’ll want to organize some CC/interrupts for, to verify its Poisonous Spore assault instantly stops. Then your workforce can maintain the opposite Barbed Root.
Prophet Ez’rath mechanics for Fellowship dungeon The Coronary heart of Tuzari
Fortunately, there aren’t any new enemy varieties between Vun’kahr and Ez’rath, so simply pay attention to what you’ve already handled between right here and there. Nonetheless, the toughest boss of the dungeon awaits in Fellowship’s The Coronary heart of Tuzari. That is arguably the place gamers stumble the toughest. There are some fairly intense mechanics to bear in mind. Under are all the bosses’ assaults.
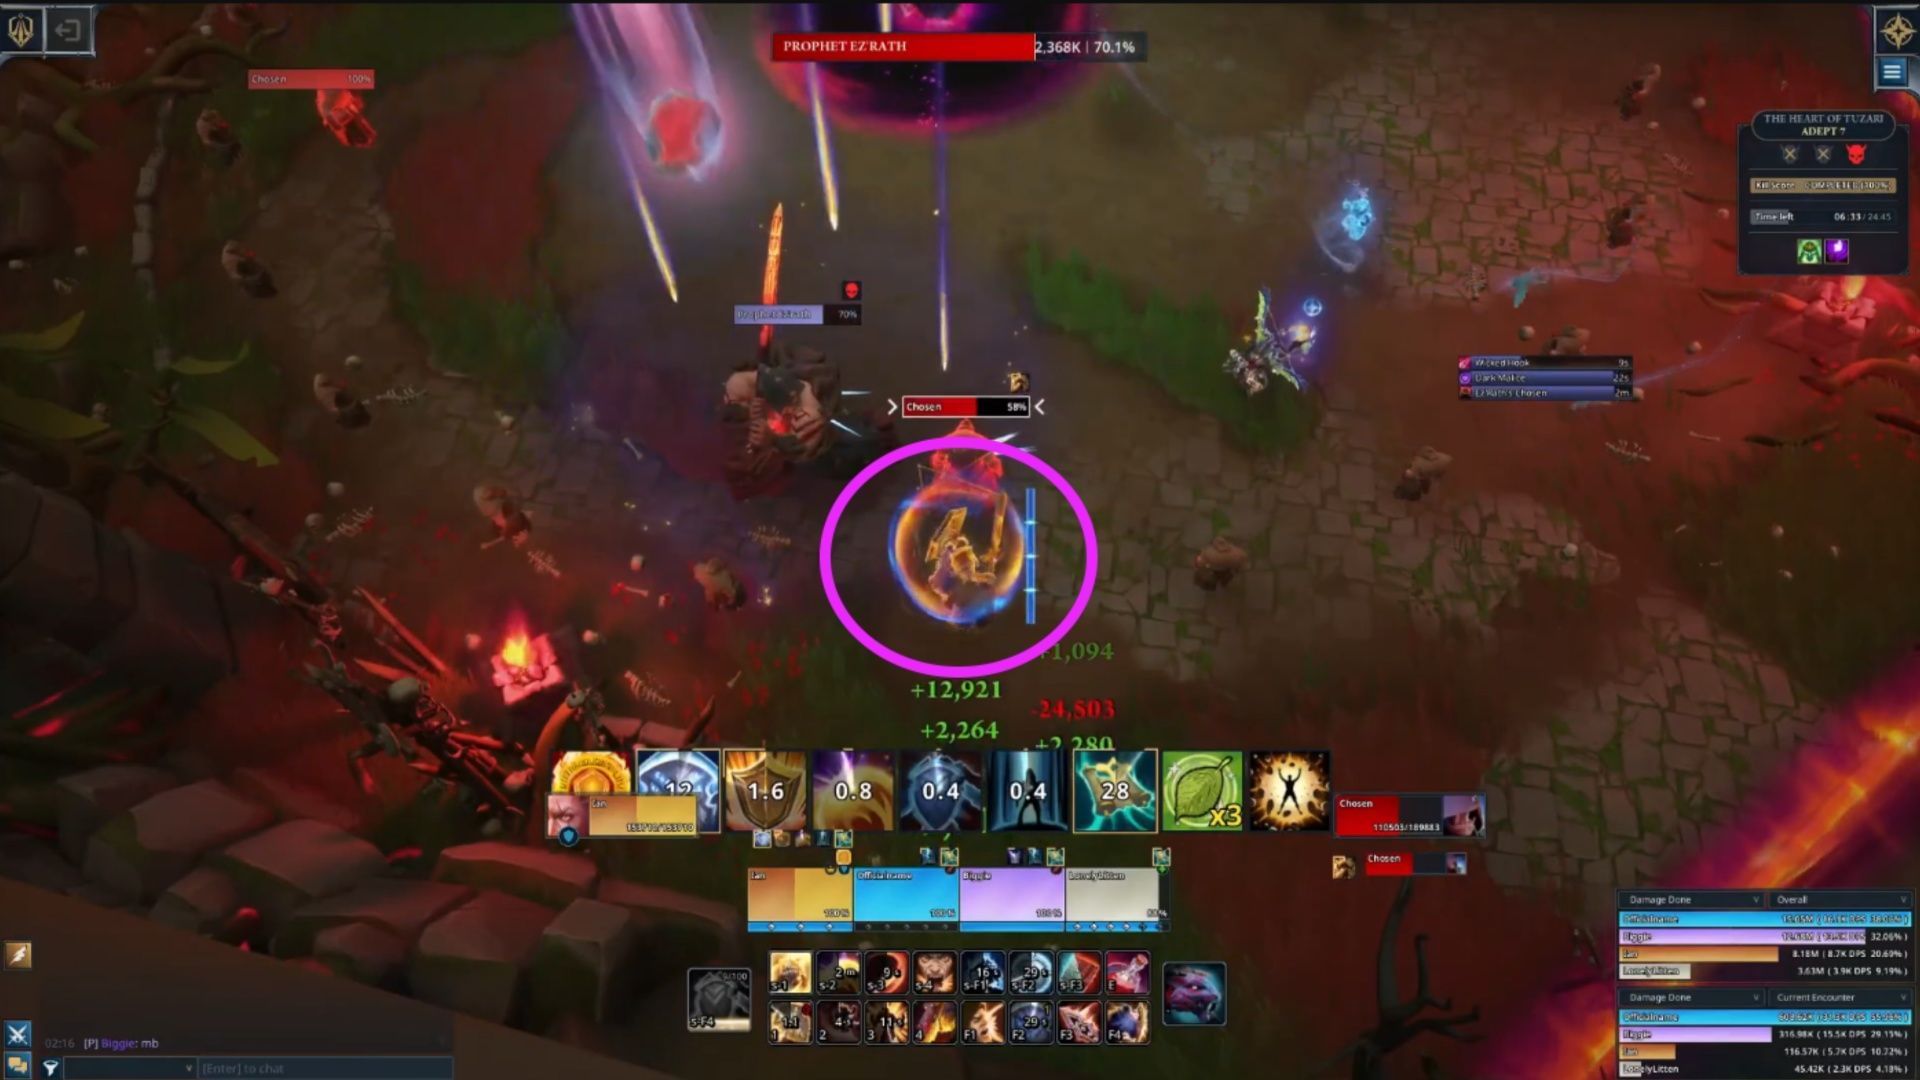
- Darkish Malice: Ez’rath creates a circle that offers huge harm to gamers caught in it after the forged ends.
- Ez’Rath’s Chosen: A sacrifice marches in direction of the Demonic Pit. In the event that they attain the Pit, a DOT hits your complete social gathering.
- Abyssal Nexus: 4 beams fireplace from the Demonic Pit and rotate. Gamers who’re caught in a beam take a big quantity of injury.
- Depraved Hook: A random participant will get hooked, which offers harm and applies a sluggish. It may additionally goal the sacrifices.
No matter you do, don’t contact the Demonic Pit within the heart of the room. It can sluggish you, and put a 100% harm debuff on you, and you don’t want that. Conversely, the tank must make sure Prophet Ez’rath doesn’t get into the middle, as a result of it would buff his harm.
When Ez’Rath’s Chosen is forged, 4 sacrificial enemies will make their manner in direction of the Pit. In the event that they get there, for each that makes it, a DOT will hit each participant. One stack is ok, however past that, you’re doubtless going to wipe. It’s advisable to have the tank transfer in direction of the most important group of those sacrificial enemies, so you’ll be able to AOE them down. The corpses may also spawn rotating laser beams, so keep cellular to keep away from the big quantities of injury.
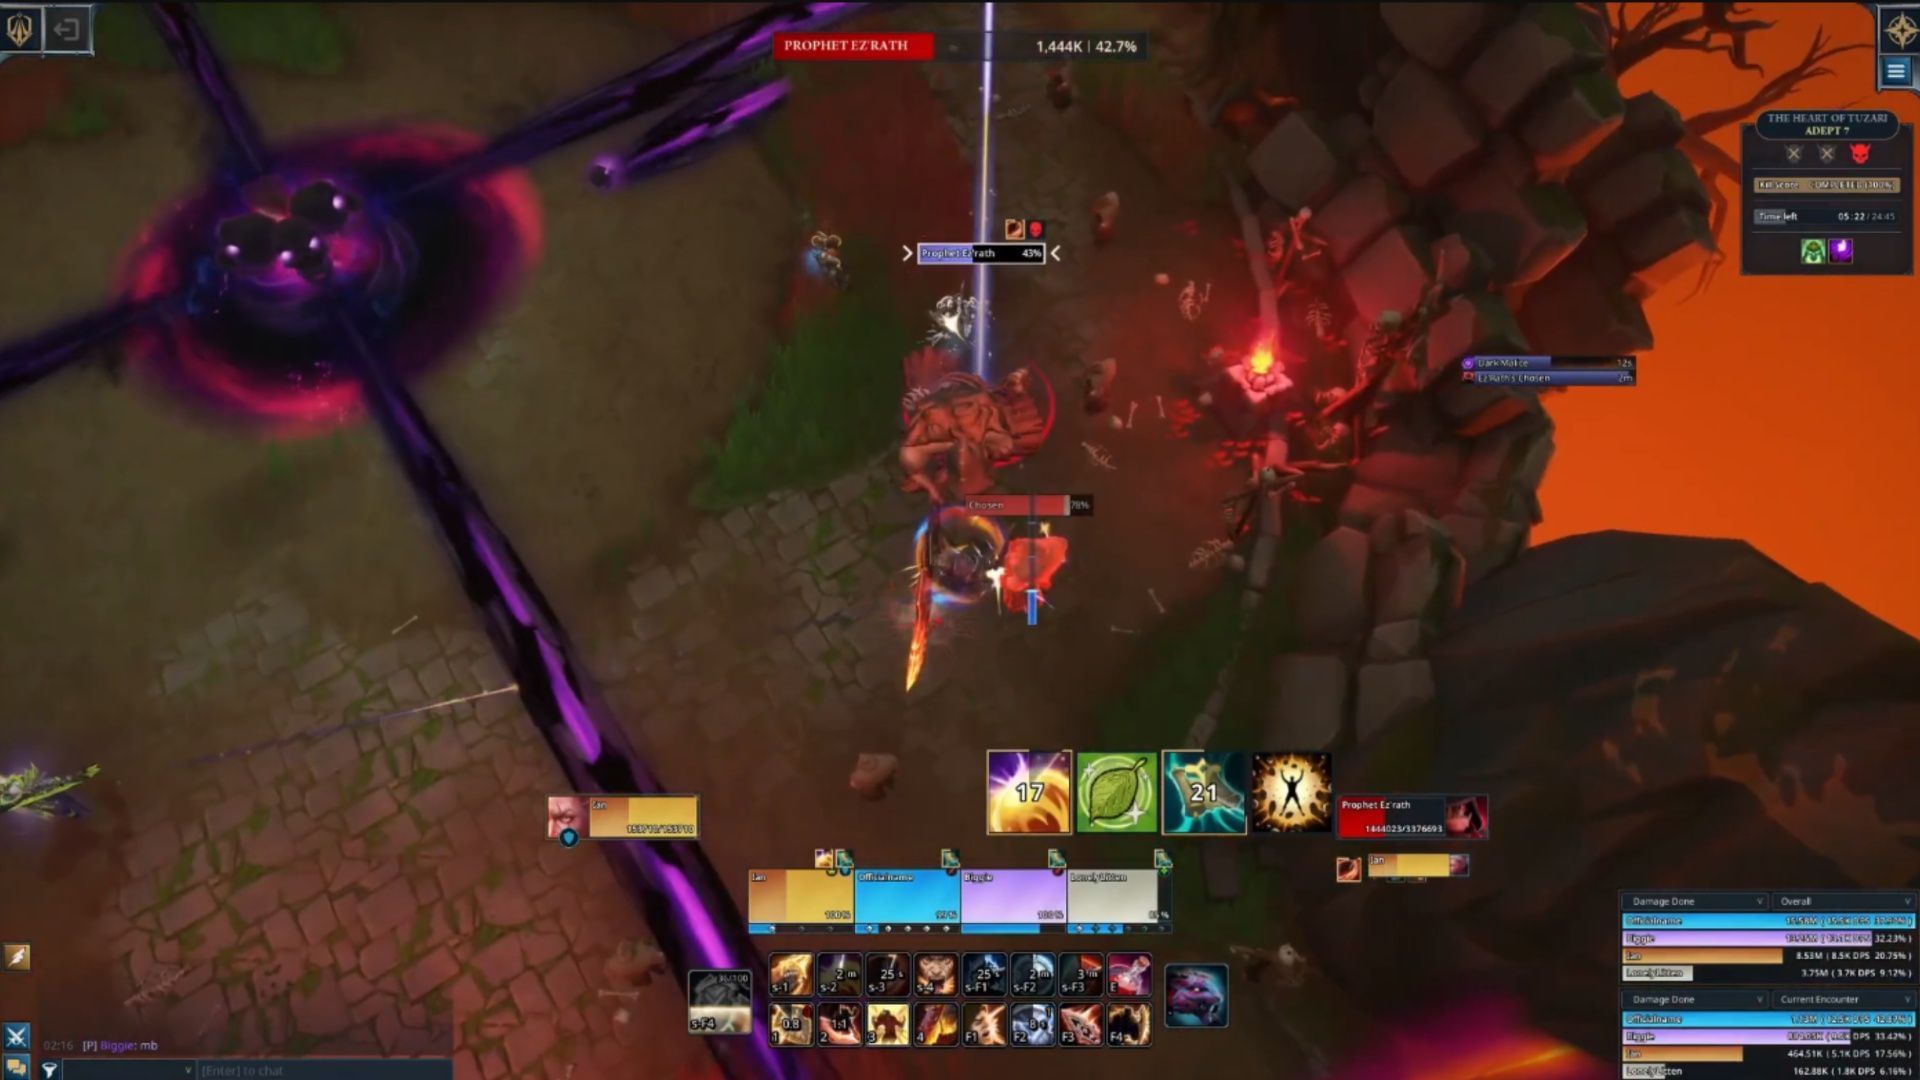
Darkish Malice hurts it doesn’t matter what, however should you’re within the circle, you’ll be able to count on to instantly die. Attempt to keep as near full well being as doable throughout and after this. You even have to fret concerning the occasional Depraved Hook, however there are methods to make use of this to your profit. If you happen to’re focused, and sacrifices are up, run behind them, so the boss will hook them and sluggish them down. In any other case, the tank ought to attempt to take it if doable, whereas utilizing a cooldown.
When you get the boss to 50% or much less, the Abyssal Nexus beams will set off, and now all of it comes all the way down to a DPS race. The trick is to maintain transferring to keep away from the beams, whereas additionally combating sacrificial targets.
You’re nonetheless going to should take care of Ez’Rath’s Chosen, and the beams make it a lot tougher to get all of them. That is the place you wish to use your whole therapeutic, assault, and defensive buffs, so the boss could be killed earlier than too many DOT stacks set off.
Potential merchandise drops from Fellowship’s The Coronary heart of Tuzari dungeon
The very best a part of clearing dungeons in Fellowship is getting higher and higher gear. Having higher gear means you’ll be able to deal with better challenges with a bit extra surety and security. Under is a listing of the whole lot that may drop on this dungeon:
Loot drops
- Bloodrite Chain (Necklace): Stamina, haste, Experience
- Blood Ruby Seal (Ring): Stamina, Crit Strike, Haste
- Bloodstone Band (Ring): Stamina, Crit Strike, Haste
- Bloodwarden Lariat (Necklace): Stamina, Experience, Spirit, Darkish Prophecy Set Bonus (2: Your skills have an opportunity to extend your Haste by 25% for 20s)
- Bloodwarden Locket (Necklace): Stamina, Experience, Spirit, Darkish Prophecy Set Bonus
- Bloodwarden Talisman (Necklace): Stamina, Experience, Spirit, Darkish Prophecy Set Bonus
- Bracers of Hatred (Wrists Plate): Stamina, Energy, Crit Strike, Experience
- Demon Claw Ring (Ring): Stamina, Haste, Spirit
- Execration Ring (Ring): Stamina, Haste, Experience
- Feathered Collar (Necklace): Stamina, Crit Strike, Experience
- Godbrand Amulet (Necklace): Stamina, Experience, Spirit, Darkish Prophecy Set Bonus
- Godbrand Festoon (Necklace): Stamina, Experience, Spirit, Darkish Prophecy Set Bonus
- Godbrand Pendant (Necklace): Stamina, Experience, Spirit, Darkish Prophecy Set Bonus
- Godbrand Talisman (Necklace): Stamina, Experience, Spirit, Darkish Prophecy Set Bonus
- Godbrand Torc (Necklace): Stamina, Experience, Spirit, Darkish Prophecy Set Bonus
- Hellbinder Pendant (Necklace): Stamina, Experience, Spirit, Darkish Prophecy Set Bonus
- Hellbinder Talisman (Necklace): Stamina, Experience, Spirit, Darkish Prophecy Set Bonus
- Imp Tooth Necklace (Necklace): Stamina, Haste, Spirit
- Infernal Bracers (Wrists Material): Stamina, Mind, Crit Strike, Spirit
- Loop of Shed Demonskin (Ring): Stamina, haste, Spirit
- Oracle Wristwraps (Wrists Material): Stamina, Mind, Crit Strike, Spirit
- Profaned Pendant (Necklace): Stamina, Haste, Spirit
- Ring of Unnatural Hearth (Ring): Stamina, Haste, Experience
- Sacral Vambraces (Wrists Plate): Stamina, Mind, Crit Strike, Experience
- Sacrificial Cuffs (Wrists Plate): Stamina, Energy, Crit Strike, Experience
- Sacrificial Provoke’s Lariat (Necklace): Stamina, Haste, Experience
- Sickle’s Loop of Ardor (Ring): Stamina, Crit Strike, Haste
- Sulfurized Festoon (Necklace): Stamina, Crit Strike, Experience
- Warding Amulet (Necklace): Stamina, Haste, Spirit
Try our different Fellowship guides and options

alt=”Jason Parker” top=”72″ width=”72″>
Edited by Jason Parker

